
3 Ways to Use Leftover Chocolate; in a drink, in a crunchy treat, or in muffins, leftover chocolate can be upcycled into great snacks.
While I’d always recommend baking, cooking and eating the best chocolate you can afford, there are times when we end up with an abundance of nostalgic cheap chocolate. Whether it’s milk, dark, or white, certain times of year and the celebrations that come with it can often lead to a surplus of chocolate in our cupboards.
The concept of “leftover” chocolate is a bit alien to some, me included. But if you can’t face large quantities of it, or you want to lighten it up with different textures, or you just want to make it go further, you’ve landed on the right page. Let’s get creative.
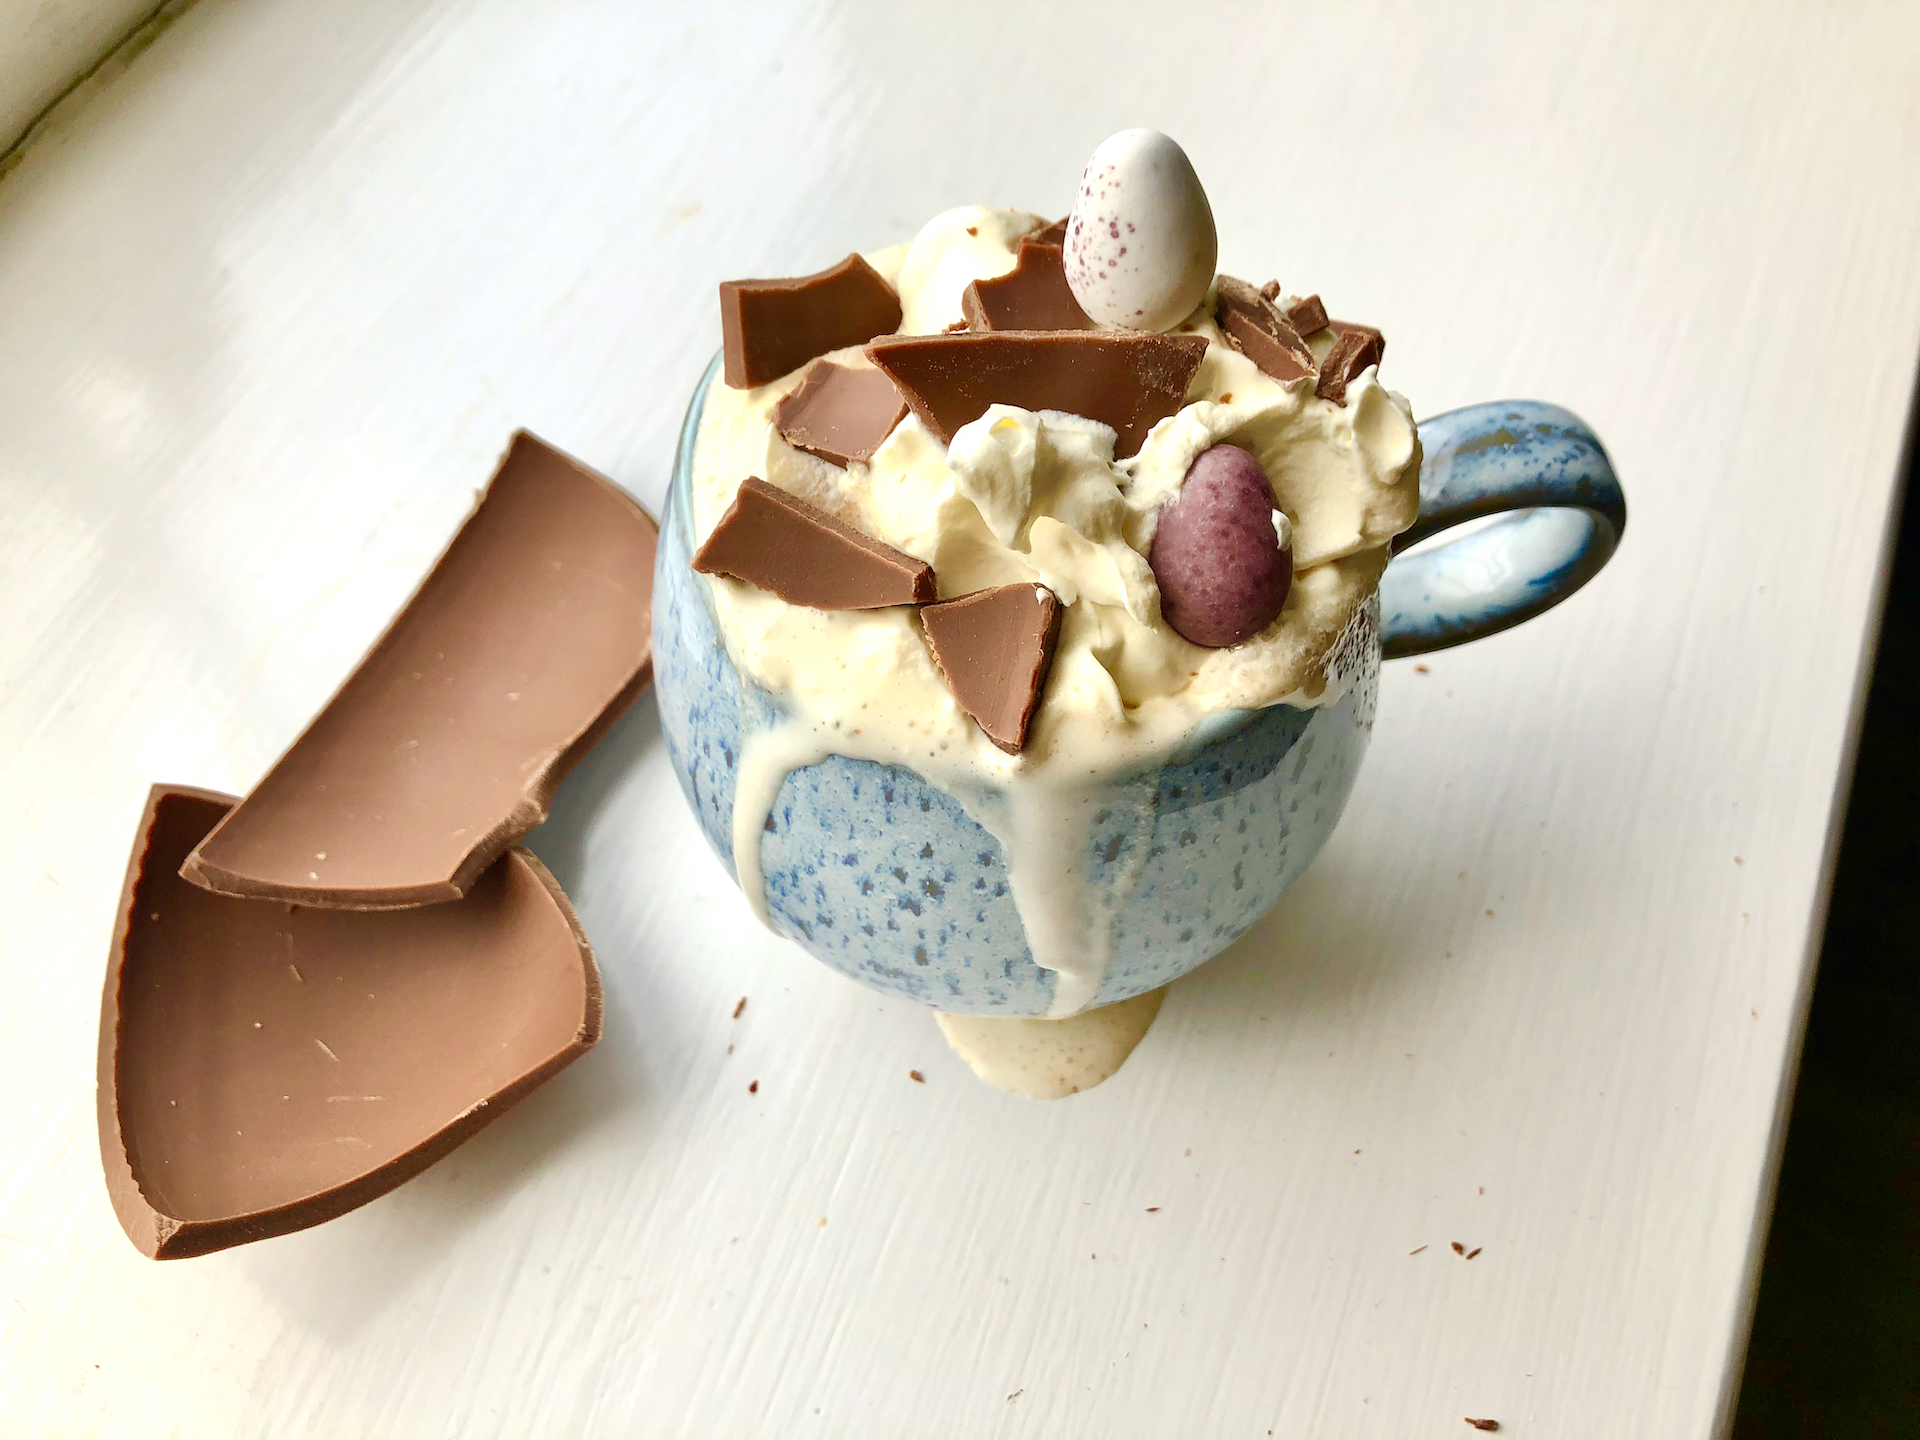
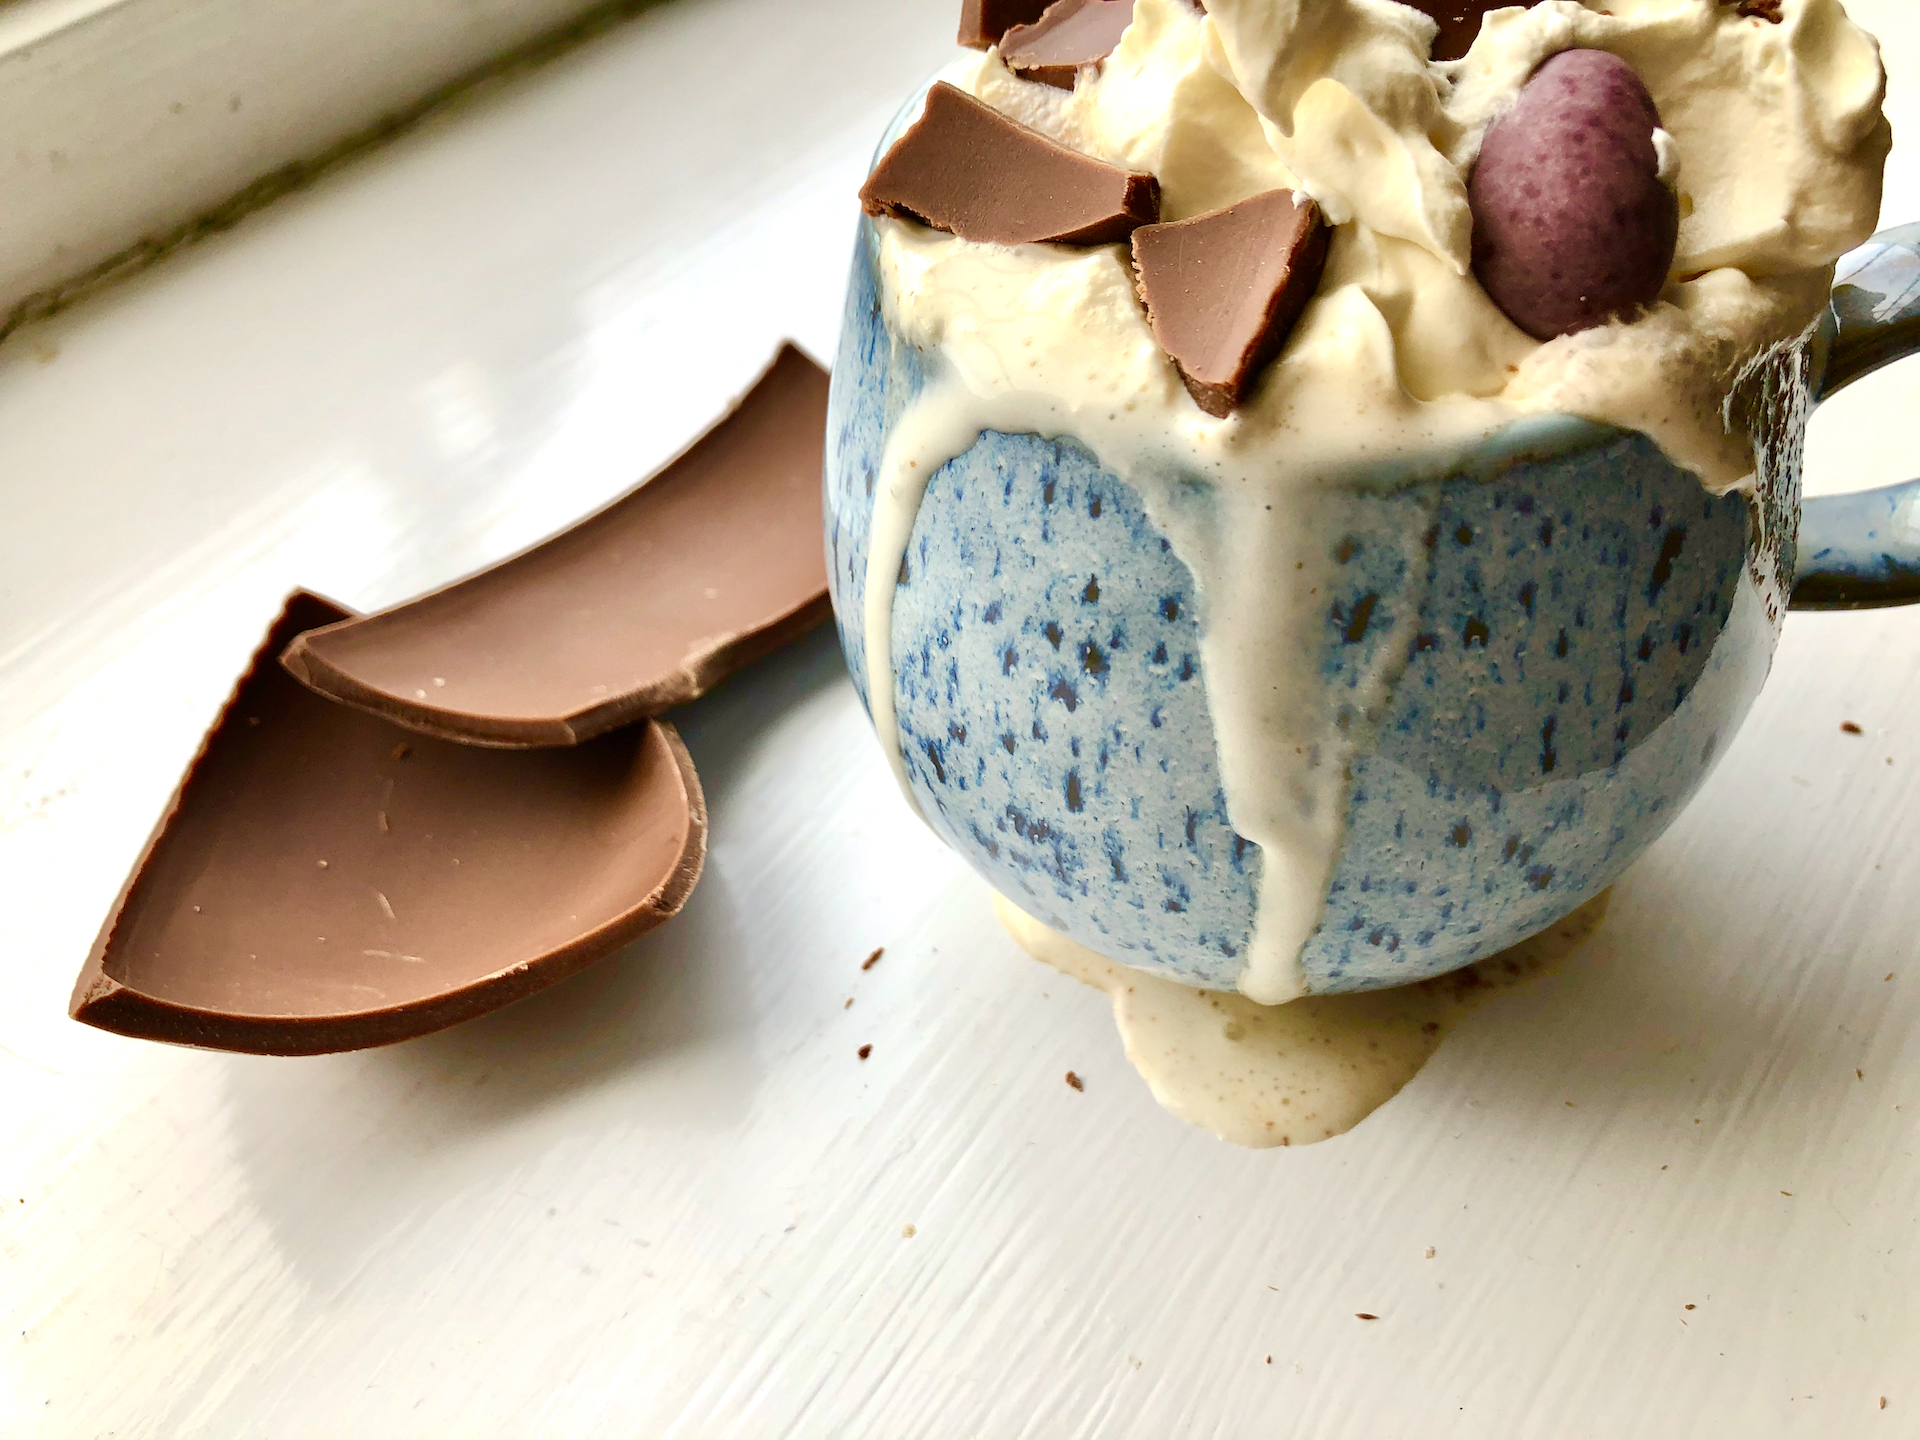
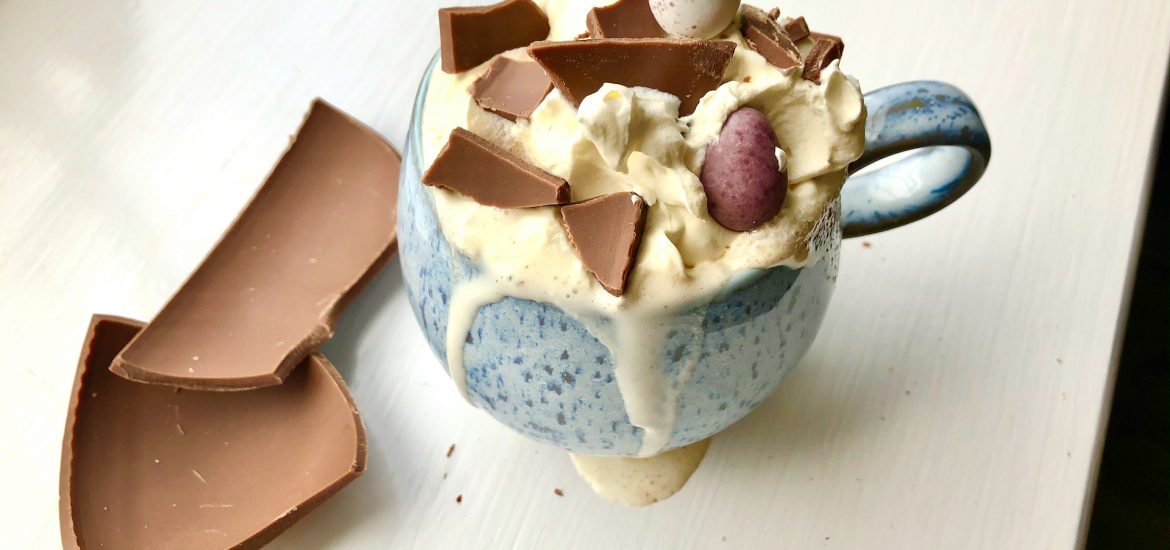
LOADED HOT CHOCOLATE
The weather in the northern hemisphere is still a bit chilly at this time of year. Or at least chilly enough to justify a cup of hot chocolate.
Hot chocolate in the UK is mostly made with dusty powder. These can provide fairly weak flavour, and also come with the nasty texture of lumpy powder bits. Making hot chocolate with actual chocolate can be just as fast, but much more delicious. It’s also a great way to use up any wee tiny bits of chocolate that aren’t good for much else.
By just heating up some milk, whether that’s cow’s milk or a non-dairy variety, and stirring broken chocolate bits into it, you’ll have a banging hot drink. Don’t forget to top it with a generous dollop of softly whipped cream and some more chocolatey bits. The bigger the better.
Simply follow the recipe below to make this Loaded Hot Chocolate!
INGREDIENTS:
- Handful of broken chocolate bits
- 250ml (1 cup) hot milk (non-dairy milks work here too!)
- 60ml (4 tbsp) softly whipped cream
- Chocolate, cocoa powder, or mini chocolate eggs, to decorate
INSTRUCTIONS:
- Break your chocolate bits into the bottom of a mug.
- Meanwhile, heat up your milk until steaming and hot to the touch. You can either do this in a small pan or in the microwave.
- Once hot, pour some of the milk over your chocolate just to cover it. Leave to sit for 1 minute.
- Stir the chocolatey milk until smooth and combined.
- Pour over the remaining milk, then stir well until you have a smooth, creamy drink.
- Pile on the whipped cream, and some more chocolatey bits for decoration.
- Enjoy!
BE A MAVERICK: this recipe is equally delicious with white, milk, or dark chocolate!
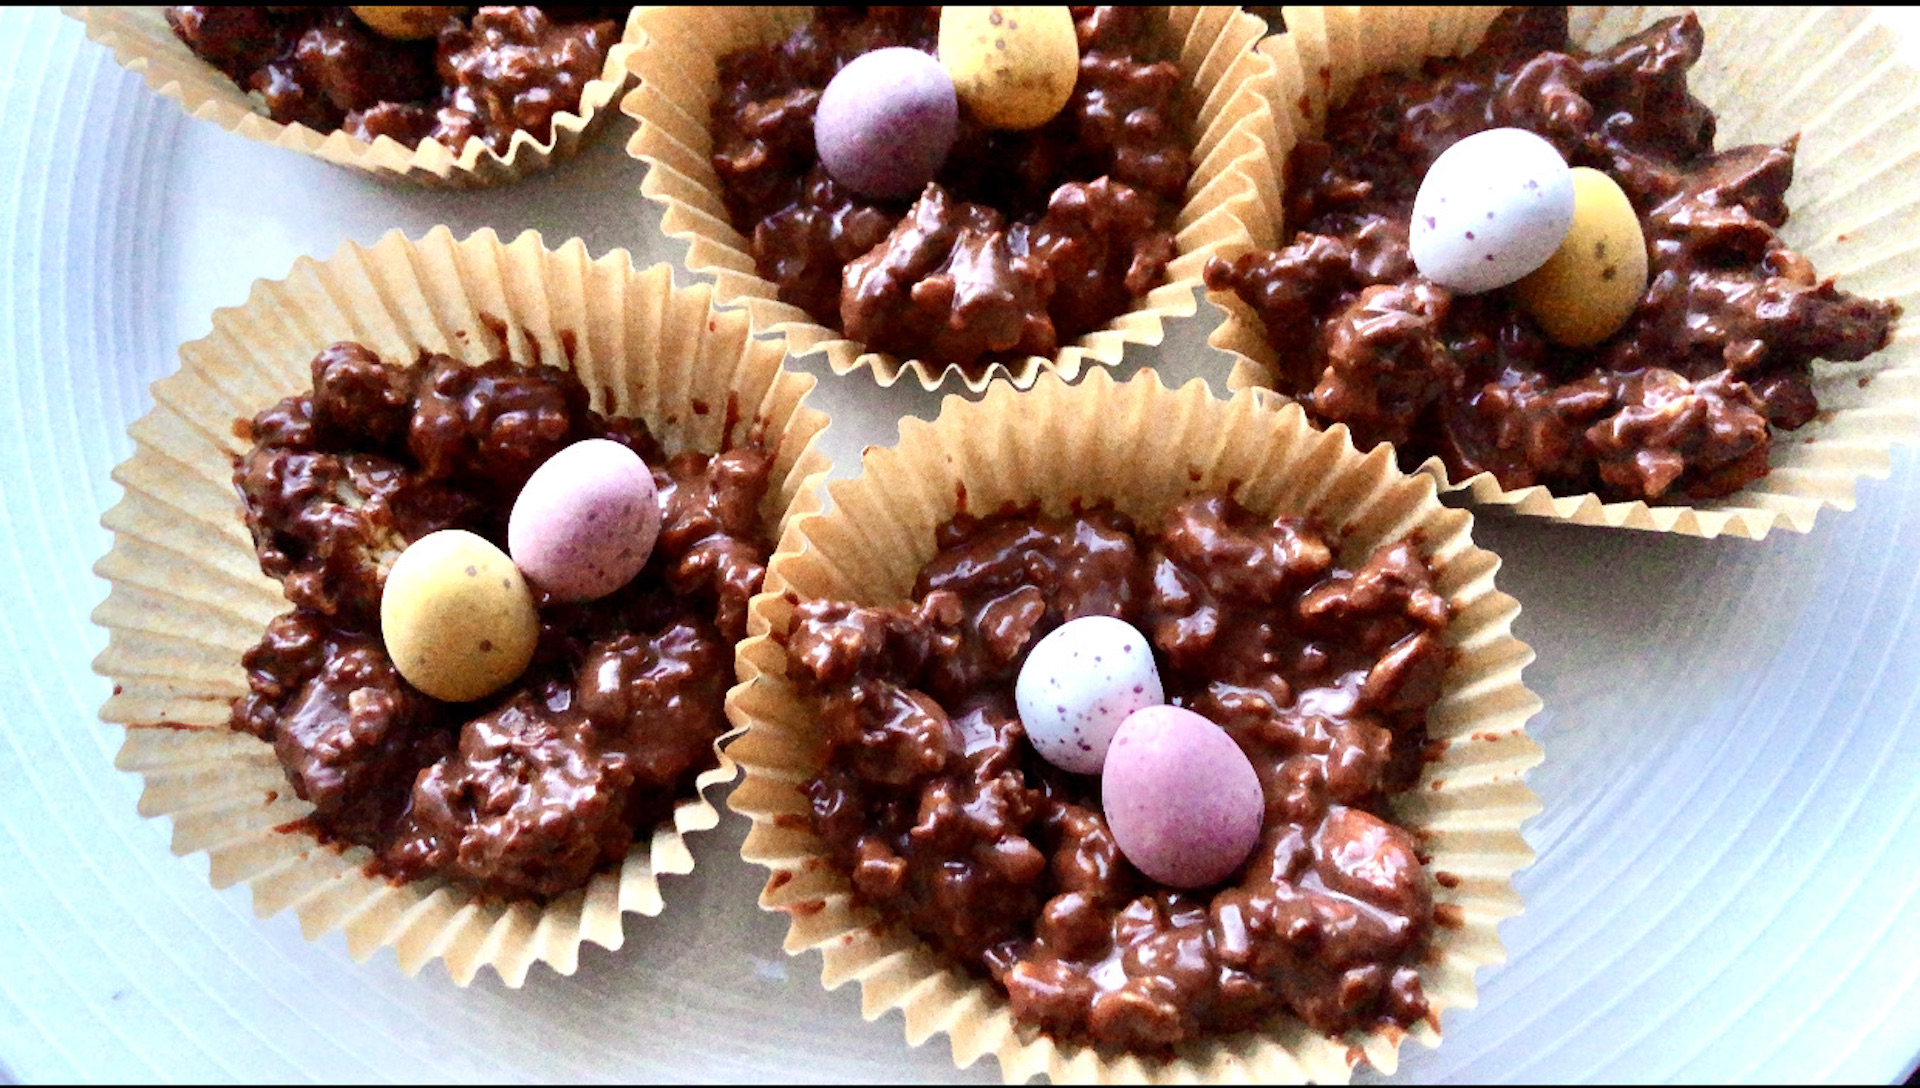
ROCKY ROAD EASTER NESTS
Chocolate Easter nests are a staple creation at this time of year. They are quick, easy and always delicious. Plus, making them with kids can be great fun.
These are usually made with cornflakes and chocolate, making for a simple treat. However, they can sometimes be a bit bland or a bit too sharp to chew on. The Rocky Road Easter Nests in today’s recipe take this treat up a notch. Every bite can give you chewy, crunchy, crispy and melty all at once.
While they are still cereal based, they make use of granola, nuts, marshmallows, biscuits and honeycomb pieces for a great blend of taste and texture. You can use just about anything you’ve got in the cupboard though. I’d imagine these would work with just about any cereal, especially once you throw in some extra chewy and crunchy bits.
Simply follow the recipe below to make these Rocky Road Easter Nests!
INGREDIENTS:
- 150g (1 cup) your favourite cereal or granola
- 100g of other crunchy or chewy mix-ins (I used biscuits, marshmallows, and honeycomb pieces)
- 250g (9 oz) broken chocolate bits
- 50g (3 tbsp) salted butter
- Handful of chocolate eggs, to decorate
INSTRUCTIONS:
- In a large bowl, stir together your cereal and other mix-ins. Set aside.
- In a separate heatproof bowl, melt together your chocolate and butter. You can either do this over a pan of gently simmering water, or in the microwave.
- Pour your melted chocolate butter mixture over the dry ingredients and stir to combine.
- Spoon the chunky mixture into 10-18 muffin cases, leaving a dimple in the centre for your eggs.
- Press 1-2 chocolate eggs into the dimples.
- Allow to set on a cold windowsill or in the fridge until firm.
- Enjoy!
BE A MAVERICK: you can use whatever crunchy or chewy mix-ins you like here, a combination of textures and of salty-and-sweet flavours makes for the best treats!
These Rocky Road Easter Nests will keep well in an airtight container for up to 5 days. No need to refrigerate, unless you prefer them cold!
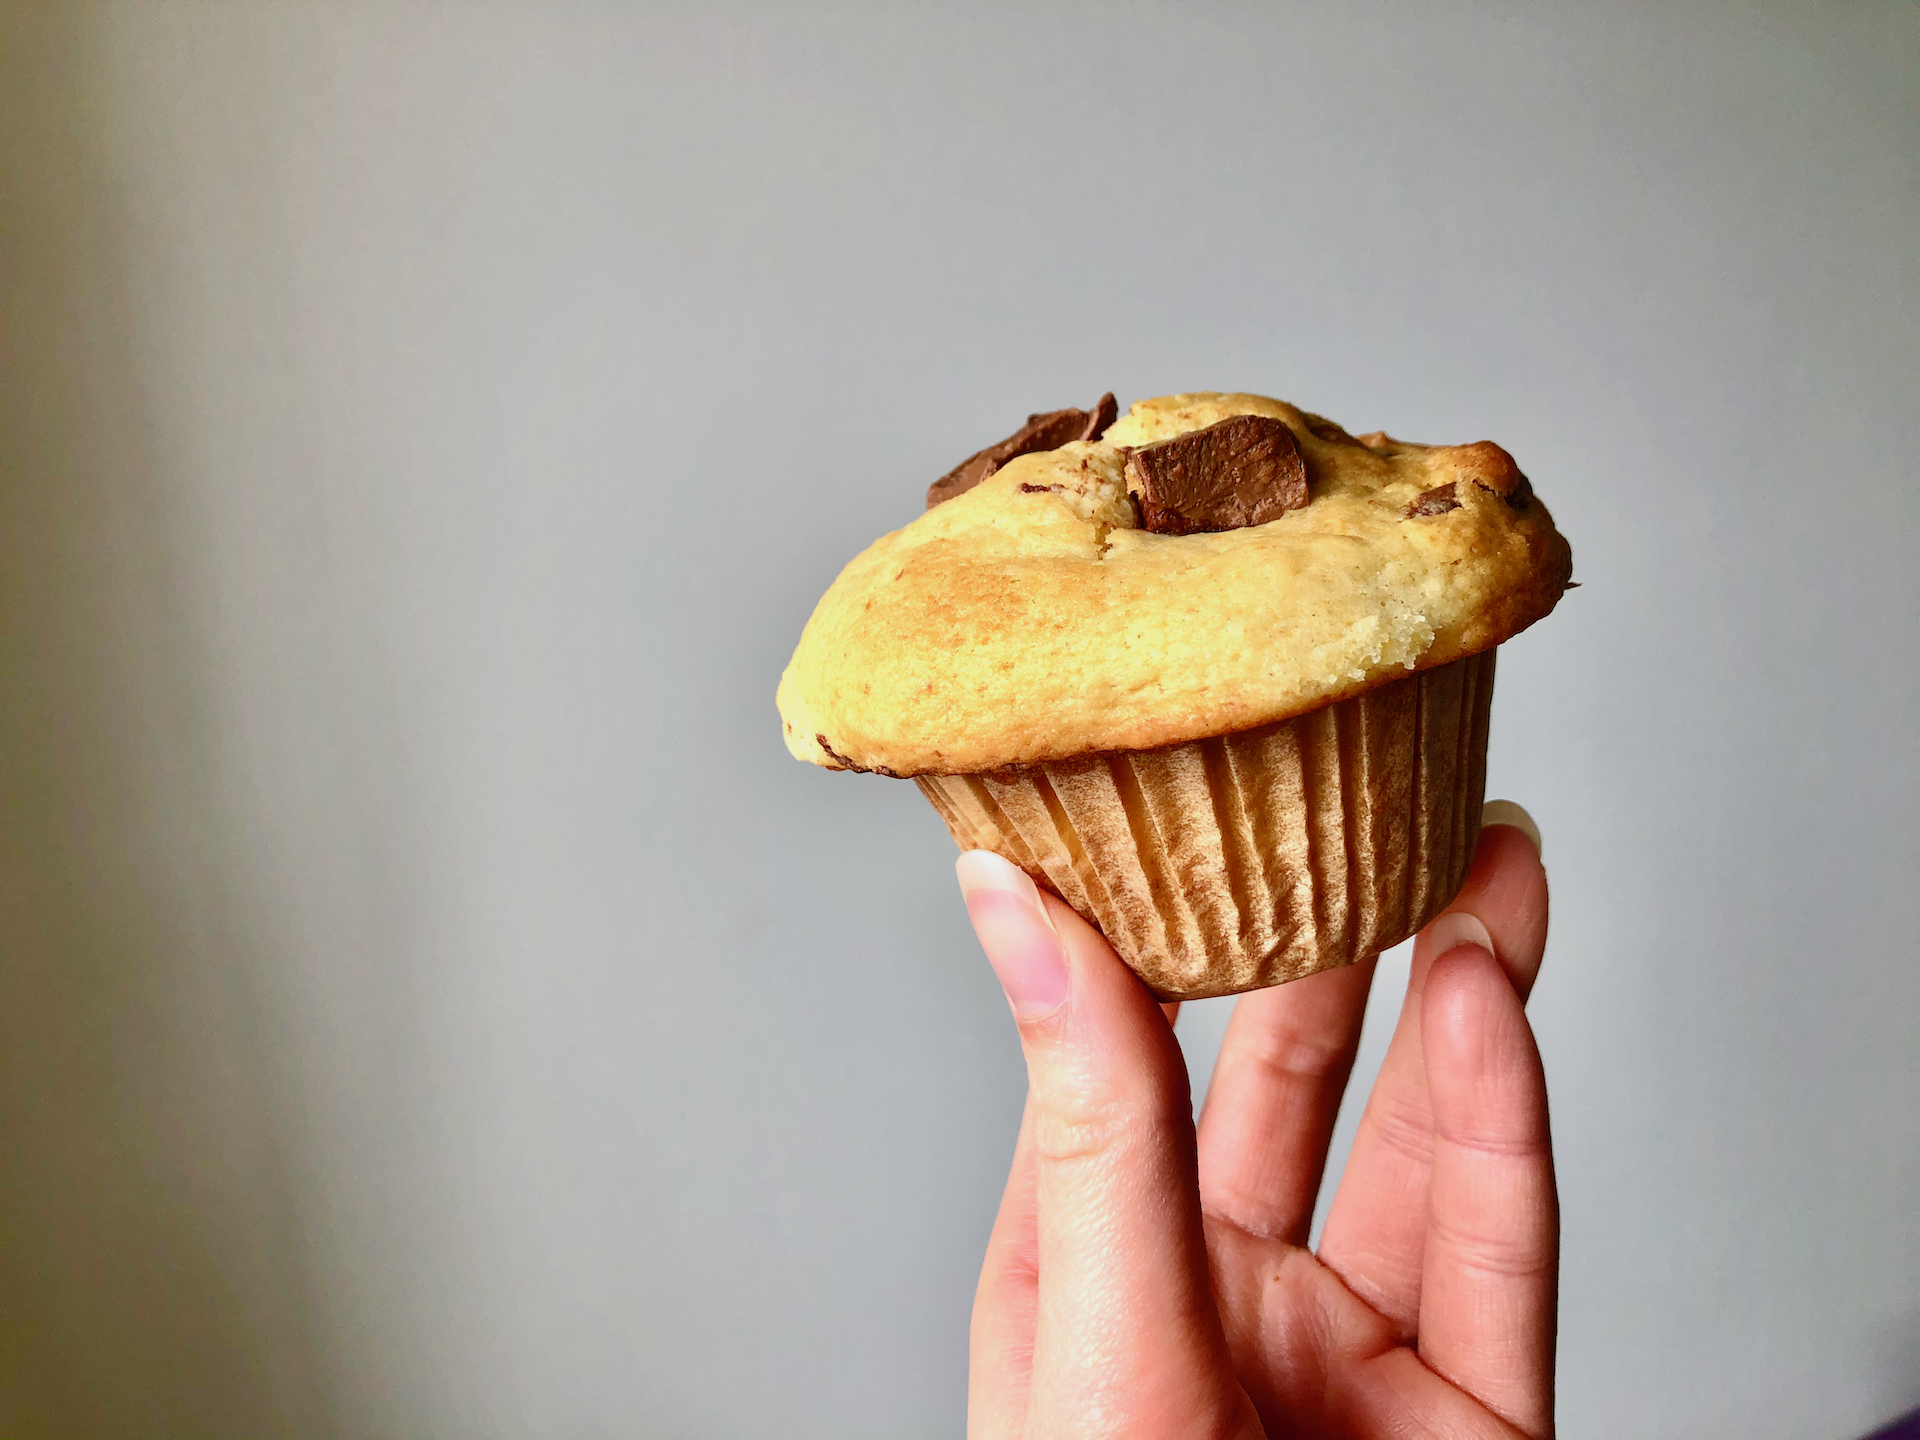
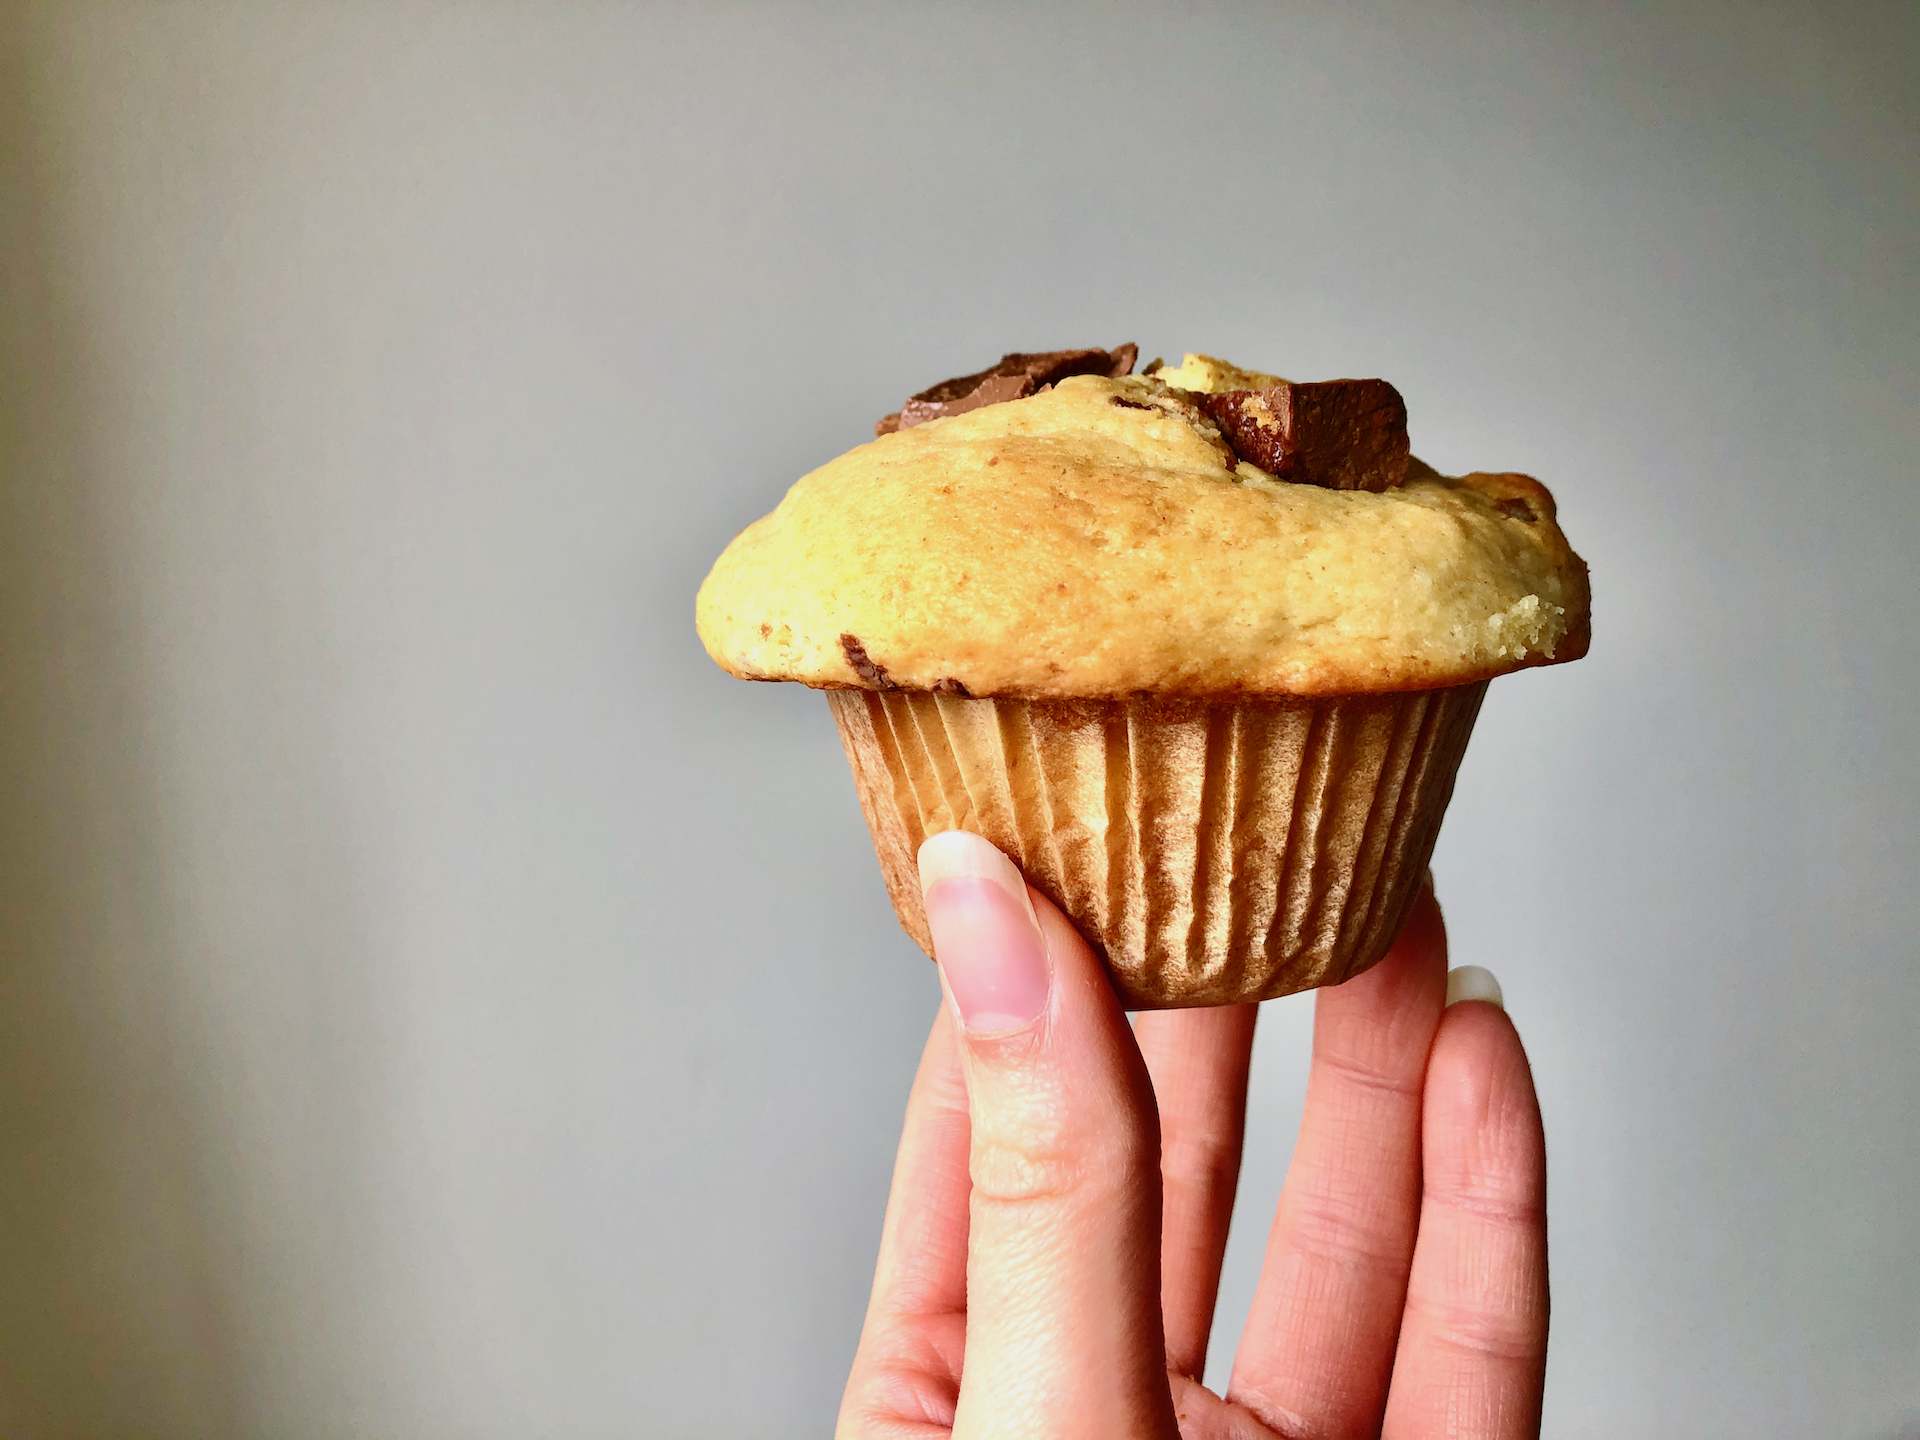
CHOCOLATE CHUNK VANILLA MUFFINS
If you want to get more mileage out of your leftover chocolate, these muffins are a great way to do it. They are a lighter way to enjoy creamy milk chocolate, rich dark chocolate, or sweet white chocolate. Muffins are a great breakfast or snack, and they are much easier to share than random shards of chocolate bits you have lying around.
This recipe is a simple one that just involves mixing wet ingredients into dry ingredients and baking the mixture at a high temperature for a few minutes. The muffins the mixture creates aren’t hyper-sweet or too dense and cake-like. Beneath their voluptuous tops is a glorious fluffy texture studded with just enough chocolate to keep you coming back for another bite.
Simply follow the recipe below to make these Chocolate Chunk Vanilla Muffins!
INGREDIENTS:
- 250g (1 ⅔ cups) self-raising flour
- 150g (5 oz) broken chocolate bits, plus extra for topping
- ½ teaspoon baking powder
- ½ teaspoon bicarbonate of soda
- 100g (½ cup) caster sugar
- Pinch of salt
- 180ml (¾ cup) buttermilk, or milk with 1 tbsp vinegar
- 75ml (⅓ cup) vegetable oil (such as olive or rapeseed)
- 1 large egg
- 2 tsp vanilla extract
INSTRUCTIONS:
- Preheat your oven – 200°C / 180°C fan / 425ºF / gas mark 6 – and line a 12-hole muffin tin with 8-10 paper, foil or silicone muffin cases.
- In a large bowl, measure the flour, chocolate, baking powder, bicarbonate of soda, caster sugar and salt, and whisk together.
- In a separate bowl or large jug, whisk together the milk, oil, egg, and vanilla until combined.
- Pour the liquid mixture into the dry mixture, and stir gently until everything is just combined. You don’t want to over-mix as this can lead to dense, heavy muffins!
- Using a large spoon or ice cream scoop, spoon the batter into 8-10 muffin cases, depending on how large you would like your muffins to be.
- Place a couple of extra chocolate bits on the top of each muffin-to-be. Press them down a little to settle into the mixture.
- Bake in the hot oven for 10 minutes, before reducing the heat to 180°C / 160°C fan / 375ºF / gas mark 4 and baking for another 15-20 minutes. By then your muffins should be well risen, golden, and springy to the touch.
- Once baked, remove from the oven and allow the muffins to cool completely in their tin.
- Enjoy!
BE A MAVERICK: you can swap out half of the chocolate for some raspberries or blueberries for a fruity twist!
These Chocolate Chunk Vanilla Muffins will keep well in an airtight container for up to 3 days. No need to refrigerate, unless you prefer them cold!
I hope you guys get some inspiration or ideas from today’s recipes, no matter what time of year you stumble upon them. Thanks for stopping by!